macOS Big Sur VMs with Metal
Details for enabling Metal support in macOS Big Sur VMs
Enabling Metal Graphics in macOS Big Sur VMs
With macOS Big Sur, Apple has given us a new set of features that will allow macOS virtual machines to achieve something long sought after: Accelerated 3D Graphics with Metal!
While the feature isn’t quite up to our quality bar just yet, we think it’s far enough along to share with folks so we can gather feedback.
While this is possible with Fusion 12.0 and macOS 11.0, there are many critical bugs fixed in Fusion 12.1 and macOS 11.1, so we recommend using those versions and newer.
Note: This is an experimental feature and is not recommended for production VMs… There are known bugs which may cause an immediate kernel panic of the VM (try connecting the FaceTime camera for a fun example!)
Additionally, this only applies to Big Sur Hosts with Big Sur Guests, it is not and will not be made possible with Catalina hosts or guests.
Also note that not all Metal shaders are supported yet, and OpenGL will not be supported.
Finally, on some systems we’ve noticed it takes what seems like a REALLY long time to boot, with the VM looking like it’s frozen with the Apple logo and loading progress indicator. Give it a minute, it should still boot.
We’re working to improve our own code as well as working with Apple to resolve these issues.
With those caveats, we’re ready to go… Enabling it is as simple as modifying the .vmx config file for your macOS Big Sur VM.

Note: Did you know you can hold Control, Option or Command to change options in the right-click menu? I use ‘Command’ to read logs ALL THE TIME…
To do this:
- Open the Virtual Machine Library in Fusion
- Right-Click your macOS Big Sur VM
- Hold ‘Option’
- Select ‘Open Config File in Editor’
- Add the following 2 lines to the bottom of the file
- Note you may need to delete an existing line ‘svga.present=“TRUE”’
svga.present="FALSE"
appleGPU0.present="TRUE"
Now, once that’s done you can launch the VM, but you’ll need to install the newest version of VMware Tools (11.2 as of this writing) inside the VM to support Resolution Changes. This version of Tools does not currently ship with Fusion so it must be downladed seperately.
You can find Toolls 11.2 here: VMware Tools 11.x Downloads
Installing it on macOS can be done in two ways, I’ll start with the one I use. This can be done before or after adjusting the .vmx file as described above.
- Download the VMware Tools 11.2 zip file
- If you’re using Safari it should automatically unzip it into a folder, otherwise unzip it manually
- In the vmtools folder there is a file ‘darwin.iso’ which contains the Tools 11.2 installer
- In the Virtual Machine, select the ‘CD/DVD’ device and click ‘Choose Disk or Disk Image’
- Select the darwin.iso
- Connect the CD/DVD
- Once it mounts to the desktop, double-click the Tools Installer.
- Accept the security prompts and reboot when it’s done

After rebooting when the installation finishes, everything should be good to go.
The second method is to simply drag-and-drop the vmtools folder into the VM, and double-click the darwin.iso file. macOS will mount it, and you can double-click the Installer from there.
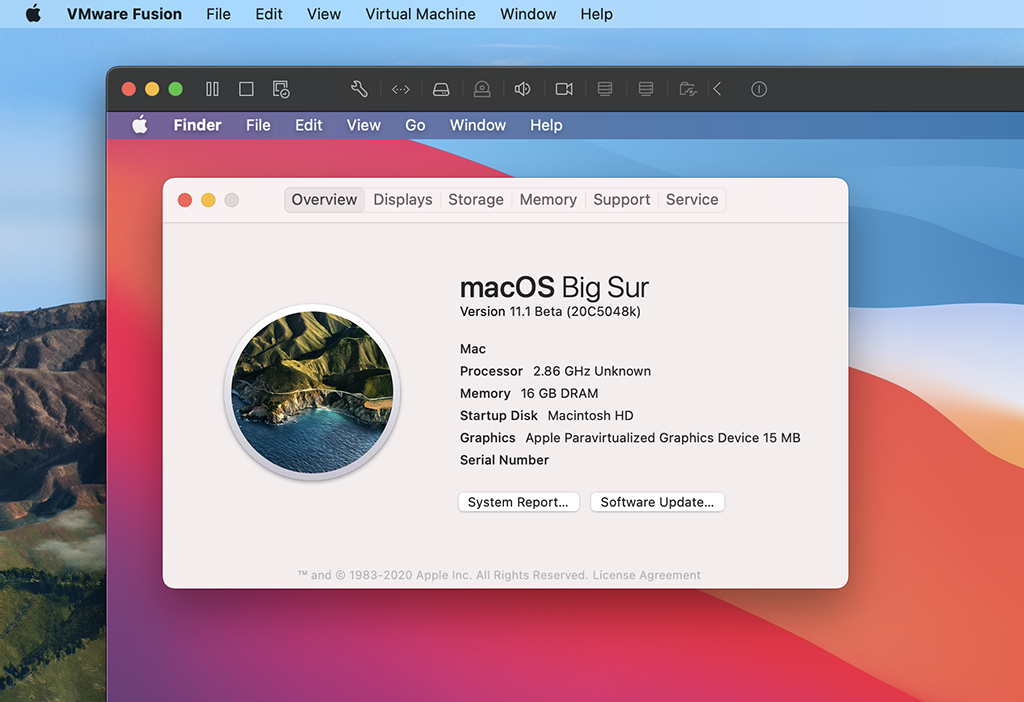
You can verify by checking the Menu Bar Apple logo > About This Mac… If you see the ‘Apple Paravirtualized Graphics Device’ (like in the header image of this post), you’re all set!
We’re really excited about this feature, and are looking forward to the time when we consider this above our quality threshold and fit to be enabled by Default!
For now, we’d love to hear your feeeback in the newly redesigned Community Forums